
Tuesday, December 25, 2012
Saturday, November 17, 2012
Garage Find: Schwinn Continental and Raleigh Sovereign
Vicky brought me these two old bikes that were in her garage. They have the looks I always look for: horizontal top bar, old fashion forward thrusting fork, great original colors, cool little details, not too much rust... but they are not in working condition. Let's see what I can do to give them a second life.
1973 Schwinn Continental:
 1980s Raleigh Sovereign:

I'm going to try to fix them and make them look good using as many recycled parts as possible.
1973 Schwinn Continental:


I'm going to try to fix them and make them look good using as many recycled parts as possible.
Monday, September 10, 2012
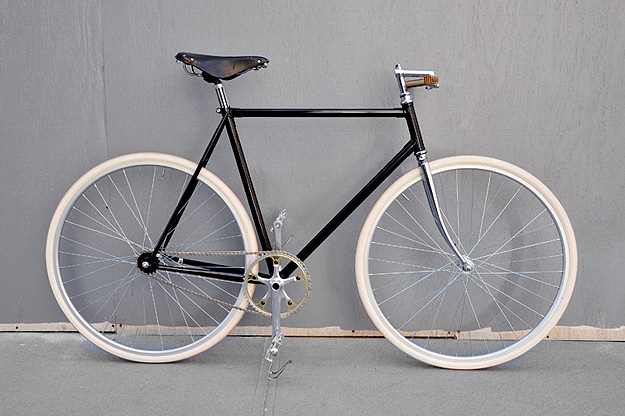
My brother caught the single speed bug
Here is the bike my brother decided to convert to a single speed bike, equipped with a 120mm Velosteel coaster hub I sent him:

That thing has some sweet chiseled lugs:

Here is the final result: sleek, efficient and cool.

He's turning some heads over in Bourges, France, because nobody's got one like this (coaster brakes are extremely rare in France). Steph, you got style!

That thing has some sweet chiseled lugs:

Here is the final result: sleek, efficient and cool.

He's turning some heads over in Bourges, France, because nobody's got one like this (coaster brakes are extremely rare in France). Steph, you got style!
Sunday, June 3, 2012
Wheelbuilding
Wheelbuilding is a very useful skill when customizing bicycles. I have a Raleigh Sport from 1970, normally equipped with a 3 speed Sturmey Archer hub and a set of cantilever breaks, which I want to convert to a single speed bike equiped with a Bendix coaster brake:

First I gather a 36 H coaster hub, a rim, 36 spokes and nipples, a tire and a tube (all of which are recycled materials). I'll use a small flat head screwdriver and a spoke wrench to loosen and tighten the spokes:

I take apart the hub so that I have access to the lips on its edges, through which the spokes will go.

Install the key spoke, from the right of the hub to the right of the valve hole, and which runs inside the lip of the hub, and therefore is introduced from the outside. Grease its thread before screwing the nipple on it. The hub here presents its cog side (or freewheel):

Repeat the procedure leaving a hole between each spoke at the hub, and three holes between each spoke at the rim:

This is what the wheel looks like after the first set of 9 trailing spokes have been installed:

Flip the wheel. Now the key spoke is at the left of the valve hole. At the hub, find the hole that is slightly to the left of the one through which the key spoke runs on the other side. Run a spoke through it, all the way to the hole on the rim that is to the left of the one through which the key spoke is affixed:

That's after the two sets of trailing spokes have been installed:

Flip the wheel back. Now to the leading spokes, which run outside the lip of the hub, cross three trailing spokes: two over and the last one under. The first set of leading spokes will reach the holes to the right of the trailing spokes already attached.

Here is the view from the top after the first set of 9 leading spokes are attached:

Second set of leading spokes on the other side:

Notice that the valve hole is easily accessible with spokes running parallel on each side:

Tighten the nipples with a screwdriver...

... and a spoke wrench:

Rebuild the coaster hub:

True the wheel either with a truing stand, or like me, on the frame using your eyes:

Remount the tube and tire, et voilà:

Now I just need to find a chain...
For more info on how to build a wheel check out Sheldon Brown's wheel building tutorial. That's where I learned how to do it.
Friday, May 11, 2012
Coaster Hub Clean-up
I love coaster brakes. They allow for a completely silent ride, and for a beautiful streamlined look. Also, they last forever with virtually zero maintenance. Read the post"coaster brakes rule".
Here is a single speed Bendix coaster hub I bought on Ebay. It's really grimy, and not very pretty to look at. I'd better clean it up and tune it before I mount it on a wheel:

Take is apart, keeping the parts in order for easy reassembly, and clean with a small wire brush, steel wool and a rag. Remove all the old grease. Polish those parts until they look as new as possible:

Grease it back up. I like to use high temperature truck grease; it allows for a smooth silent functioning of the hub:

Put it back together, adjusting the pressure on the bearings so that it runs smoothly, but doesn't jiggle. Make sure the axle is centered:

Here is where this one's going:

Next: a little lesson on wheel building...
Ain't complete without a bell...
A bicycle bell is a cool, useful piece of equipment, and it's required by NY state law. I always try to find good looking old ones with a nice sound.


Tuesday, May 8, 2012


Sunday, April 29, 2012
Eyes on the road, hands on the handlebars...
Three weeks ago, I had a bicycle accident in Onondaga park. I was just coming out of a long sprint on a track bike, and stupidly, I let go of the handlebars, got upright to relax my back, and pedaled hands free for a while, watching the landscape, still going fast, until my right foot slipped... I went from 20 miles an hour to zero instantly, on tarmac. I fell backwards sideways. It went so fast, I still can't figure out exactly the details. My shoulder hit first, then my head, my side, my hip, my leg. The heaviest of the blow was absorbed by the shoulder. I ripped my favorite fleece jacket. All I could think of in that fraction of a second in mid air was: thankfully I'm wearing a helmet, and: is my helmet strong enough? It was. While my whole body felt chewed up, as if jumping off a rolling car, my head got nothing. After the blow I laid on the road motionless for a minute, unable to catch a breath. I had heard a "crack", so I thought maybe I had broken something. I moved one leg, the other, one arm, ow... got up painfully, completely chocked, looked for my glasses that had flown nearby, couldn't find them... it was dusk. No cell phone. Couldn't walk. Couldn't breathe. My bike was lying further, the front wheel twisted and wobbly. I straightened it the best I could, and remounted to go back home. I suffered a separated shoulder and some seriously bruised ribs. Three weeks later I still can't take a deep breath without hurting or getting up without feeling like someone is stabbing me in the chest. But it could have been far worse if I hadn't been wearing a helmet. At the very least I would have left a piece of scalp on the road. At worst I would have had a concussion or a fractured skull.
In the end I am thankful. Although I've been riding hands free since I was a child, I will not do it anymore. Lesson learned. Also, after the second chest trauma I endured this year (the previous one from a snowboarding fall), and thinking back about all the times when I rode recklessly downhill, and all the near accidents with cars and people crossing my path when they were not supposed to, I will take it easy. In the end it's a matter of probability. If you ride often, you will eventually get into an accident. If you ride fast often, you will get seriously hurt. And if you ride fast often without a helmet, you are going to get killed.

By the way, I find most bicycle helmets unbearably dorky, so I wear a skateboarding helmet. Better protection, better look, ventilation not so good. It's a trade off.
Friday, April 6, 2012
Garage Find: 1960s Girls Starjet Custom
It took me hours to clean it, but it's all original. Awesome smooth ride on freshly greased bearings...


Tuesday, April 3, 2012
Sunday, March 25, 2012
Quick Hub Swap
If you have two wheels of the same size, but you want to switch their hubs, say because you want to have a coaster hub instead of a five cog free wheel in a single speed conversion, here is what to do:
Tape the spokes on each rim so they can't shift anymore.

Unscrew the spokes either by hand or with a drill.


Give that rim a good cleaning.

Take apart the other rim in the same way.

Swap the hubs.

Put the wheels back together, tightening the spokes by hand and then true them.

Tape the spokes on each rim so they can't shift anymore.

Unscrew the spokes either by hand or with a drill.


Give that rim a good cleaning.

Take apart the other rim in the same way.

Swap the hubs.

Put the wheels back together, tightening the spokes by hand and then true them.

Tuesday, March 20, 2012
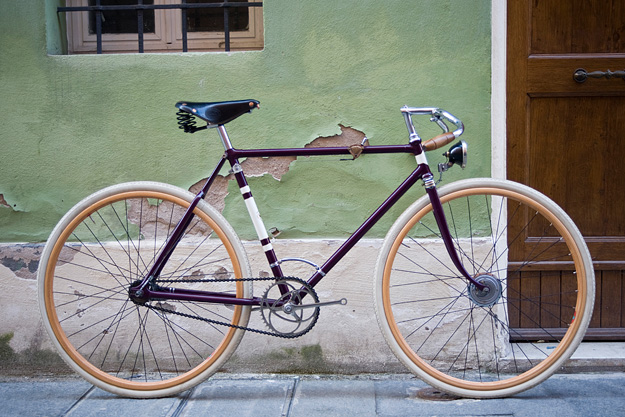
Beautiful bike
Check this out. Coaster breaks are the way to go. Bike from Bertelli of New York.
Read article on cycleexif from Australia
Read article on cycleexif from Australia
Saturday, March 17, 2012
St Patrick's Day ride
For Saint Patrick's day, we went for a ride to the parade downtown and on the creek walk with Bolivar and Jordan.


Subscribe to:
Posts (Atom)